| |
|
|
| |
When you
receive your Deluxe Emergency Pack, it
will come in a corrugated box with all
components in the original packaging.
We have made every effort to make sure
everything conforms to our parameters,
which are:
• Comprehensive urban survival equipment
• Waterproof pack, convenient size
• Weight of 15 pounds or less
• 7 days of food
• A gallon of water storage
• Cost of under $300
• Food stock can be re-supplied
from most grocery stores, camping or backpacking
stores |
|
| How to organize
your pack: |
See
instructions for major components,
CLICK
HERE |
|
| We
have done our part in putting together all
of these products in a convenient survival
pack and now you need to do your part. On
receipt of your pack and it’s components,
remove all items, familiarize yourself with
the items, take them out of their respective
packaging and we suggest repacking them
in your red pack in the following manner: |
| •
First item to go into your pack,
which you can keep in the plastic
container, is the poncho, which
lies flat on the bottom of the
pack. |
|
 |
•
On top of that, after it is
taken out of it’s packaging,
is your wilderness space blanket.
This you will keep folded
as it comes out of it’s
packaging and place it directly
on top (centered) of the poncho. |
|
|
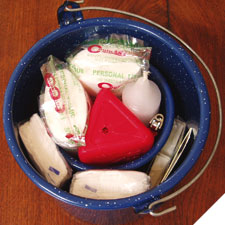
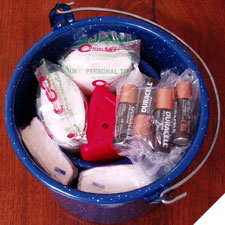
•
Next, is your mess kit that
sits directly on top of your
poncho. Your mess kit is a
1-3⁄4 quart blue enamel
steel pot with lid and is
the storage for several items.
The mess kit will come with
some items inside and you
will need to add additional
items. It will come with a
24 oz cup (that matches the
pot), batteries, Bic lighter,
waterproof matches, toilet
and facial tissue and a 9-hour
candle. What you need to add
is your Pocket Rocket stove
after removing from it’s
original packaging and reading
the instructions. This red
triangular stove pack will
nest nicely in the 24 oz cup
surrounded by the candle and
the toilet tissue rolls. There
is still room for your personal
hygiene kit consisting of
your tooth brush, toothpaste,
mouthwash, floss and floss
picks when removed from their
original packaging and put
in a small plastic zip lock
bag. Then cover your mess
kit with the lid and secure
with the rubber band provided.
|
|
| |
|
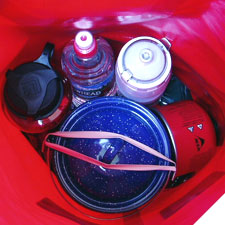 |
•
Next are your wide-mouth water
bottle, your filter bottle and
your spring water bottle. They
sit nicely, curved around one
side of your pot (mess kit)
on the side of the backpack
straps. This makes it comfortable
when carrying on your back.
Items to store in your wide
mouth water bottle are: your
knife, fork and spoon, 5 in
1 survival tool and flashlight
in its sheath. This container
leaves plenty of room for other
items you may want to add such
as personal medications, etc.
In the gap to one side of your
mess kit is where to store the
8 oz. gas can on its side. |
|
|
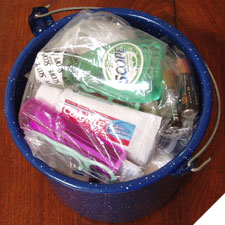
| •
Now place each of the three plastic
bags on top of the mess kit. The first
one is the misc. gear bag, which includes
your first aid kit, your radio, your
100’ of Nylon line, your mirror,
your multi-tool and a folded up Platypus
water bag. The next is the small food
bag followed by the bag with the 7
dehydrated dinners. |
|
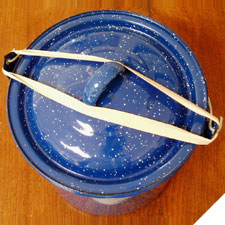
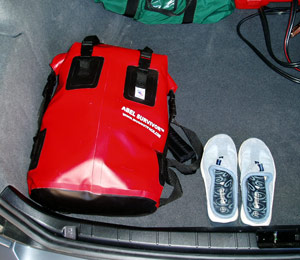
Your
pack is now full and ready to be sealed.
To seal your pack, make a fold over the
black strip, double it and press down
to push the air out of the bag, then continue
to roll around the black strip, then click
the side clips on each side and cinch
them down and do the same for the top
straps and this will make your pack totally
waterproof.
Now your pack is ready to go into the
trunk of your car.
Other items we recommend always be kept
in the trunk of your car are:
• Good walking shoes
• Extra bottles of drinking water
• Jacket appropriate for the weather
conditions of your area
• For locations with severe winters,
a sleeping bag is recommended |
 |
| Top » |
|
|
|
|
| |
|